


Gardening
Kim’s Garden Soil Recipe
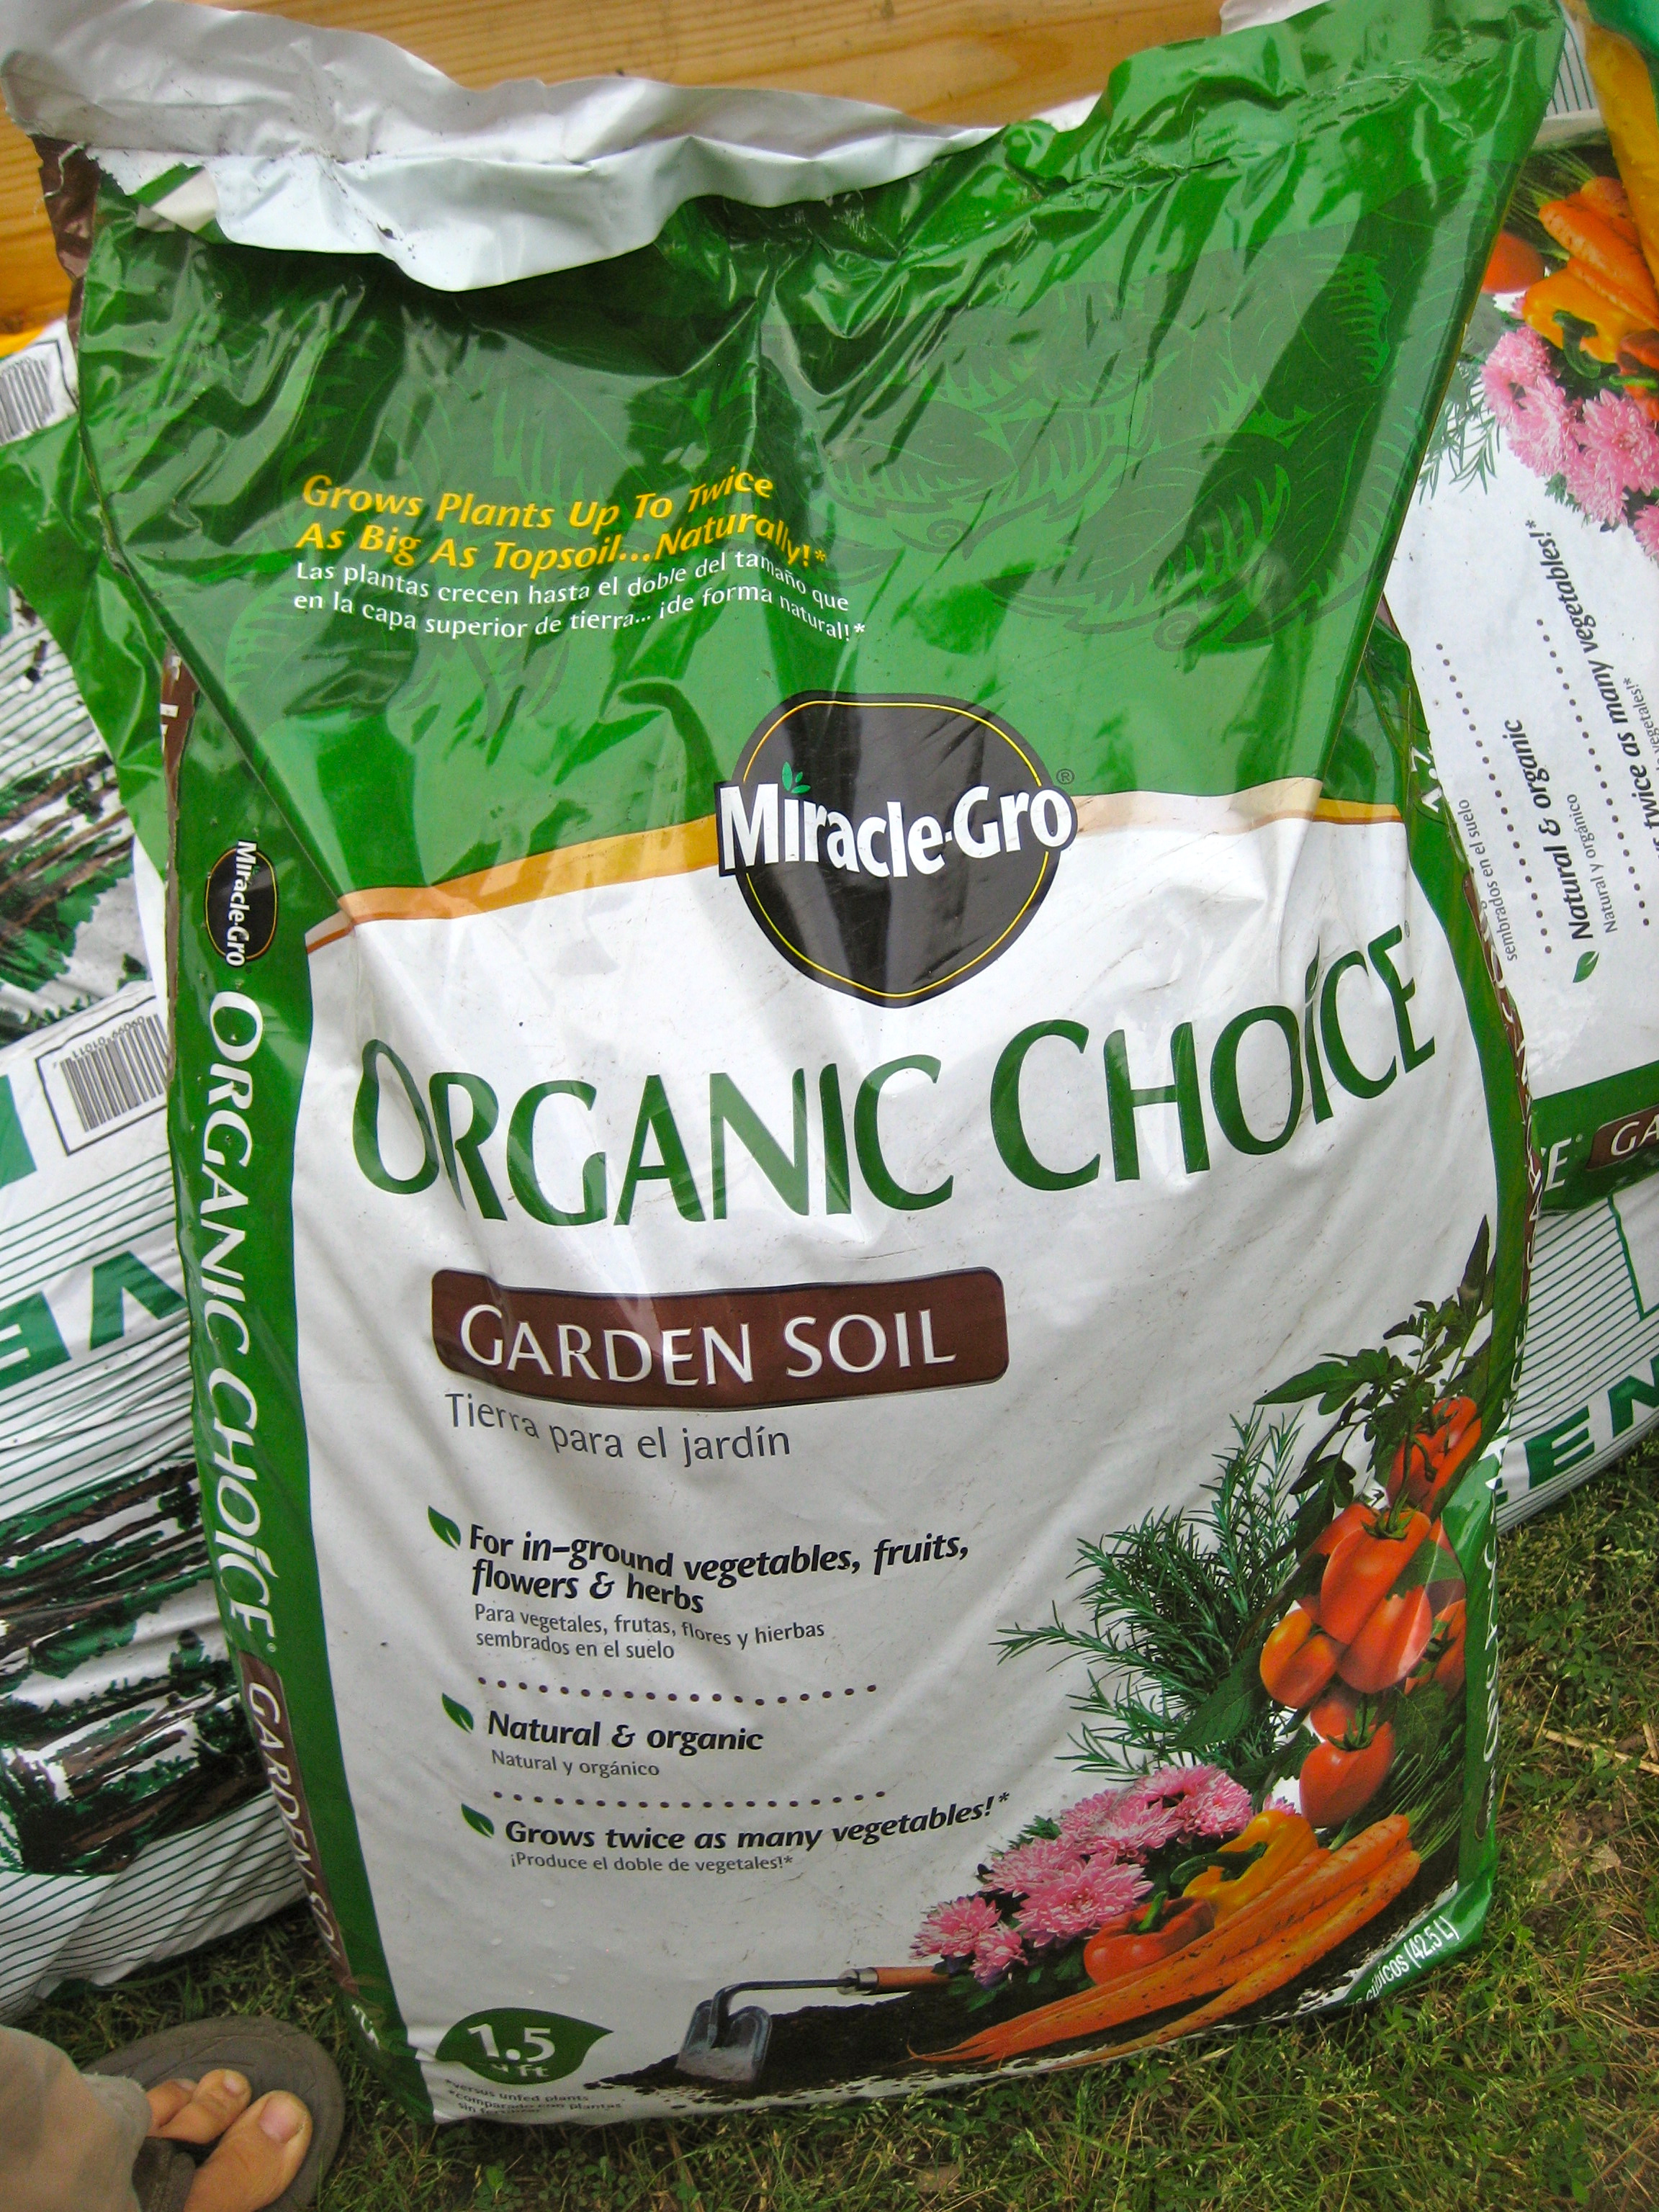
I am often asked about the soil in my raised beds. What do I use? How much? Where do I buy it?
The last two years I’ve attempted to garden directly in Germantown’s hard, unforgiving clay. Even after adding lots of compost I still had low yields.
This is the first year that I’ve used raised beds, so I did some experimenting. The nursery blend didn’t appeal to me because it lacked the high levels of compost and manure that I was looking for. I decided to blend my own based on what I was learning from Patty Moreno, the Garden Girl, and the Square Foot Garden technique. I couldn’t afford to follow their exact recipe so I improvised within my budget. I’m not sure how many bags of soil I purchased from Lowe’s and local nurseries but it was a lot! I tried to use 3 equal parts Pete moss/garden soil, compost/manure and top soil (instead of top soil, the square foot garden experts recommend vermiculite). In some beds I was able to use a higher percentage of compost/manure than the other ingredients. It’s more expensive if you have to buy it but the results are excellent.
My garden soil ingredients: Top soil, Black cow composted manure, organic garden soil, Pete moss, Nature’s Own garden blend, cotton burr compost, worm castings, a few have chicken manure and most have some rabbit manure. All of my beds had a layer of fall leaves at the bottom that I raked in last winter. One had homemade compost from my backyard composter.
This year I plan to do more aggressive composting so that next spring I can rely on my own animal manures and compost to enrich my soil. Buying all of this can be expensive so my goal is to build a self sufficient and sustainable system in my backyard.

I’m still experimenting with plant food. I love the tomato tone and garden tone the best. The liquid seaweed is still in the experimental stage. I use the tomato blossom spray only when the blossoms are falling off or are slow to set and grow tomatoes. When my rabbit manure catcher is full I empty it right into whichever bed looks hungriest. I also use my worm castings around a plant’s roots whenever the leaves start to yellow.
One very important ingredient that I always add to my beds after they’ve been planted and everything has grown to at least an inch, is mulch. I use hardwood mulch around every plant to inhibit weed germination and growth, to hold in soil moisture, protect my plants from drying out quickly, moderate soil-temperature fluctuations, and add nutrition to the soil. There are many different types of mulch to choose from including straw, hay, grass clippings, leaves, wood chips and Pete moss.

Kim’ Composting System
A few weeks ago I cleaned out my old composting box which I built with hardware cloth and wood two years ago. The leaves and grass broke down into beautiful compost but the branches, roots and twigs were still solid. I decided to redesign my structure into two simple forms and use only grass clippings, leaves and kitchen scraps (no meat or diary products) in these. Instead of building the big boxes that I wanted, I decided to go with simple and cheap (in this case free) since my resilience money has run dry. I used my old 5′ tall hardware cloth. I secured the sides with twisties. I may pull a couple of black garbage bags over these to heat up the compost and speed up the whole process once they fill up.


I also use a large trash can that I drilled holes in for composting but I have to be careful to keep the green a brown matter equal. Too many fruits and veggies without the addition of leaves, dirt or paper products result in maggots.
Occasionally I help out the city garbage collectors by picking up the neighbor’s leaves all bagged up on the curb. In the late fall there was plenty to fill up my entire composter and cover my dormant garden beds.
My worm composter works well but slow. It takes a while for the worms to break down our scraps. The best thing about this composter is the compost tea that comes out the spigot every time it rains. I’m hoping the bottom tray will be full of castings by the end of summer.


The chickens are the best composters of all. They eat EVERYTHING and turn it into gold (eggs and manure). We don’t have eggs yet but it won’t be long now.

My Suburban Homestead Photo Gallery
Kim’s Journal Entry: May 13, 2011
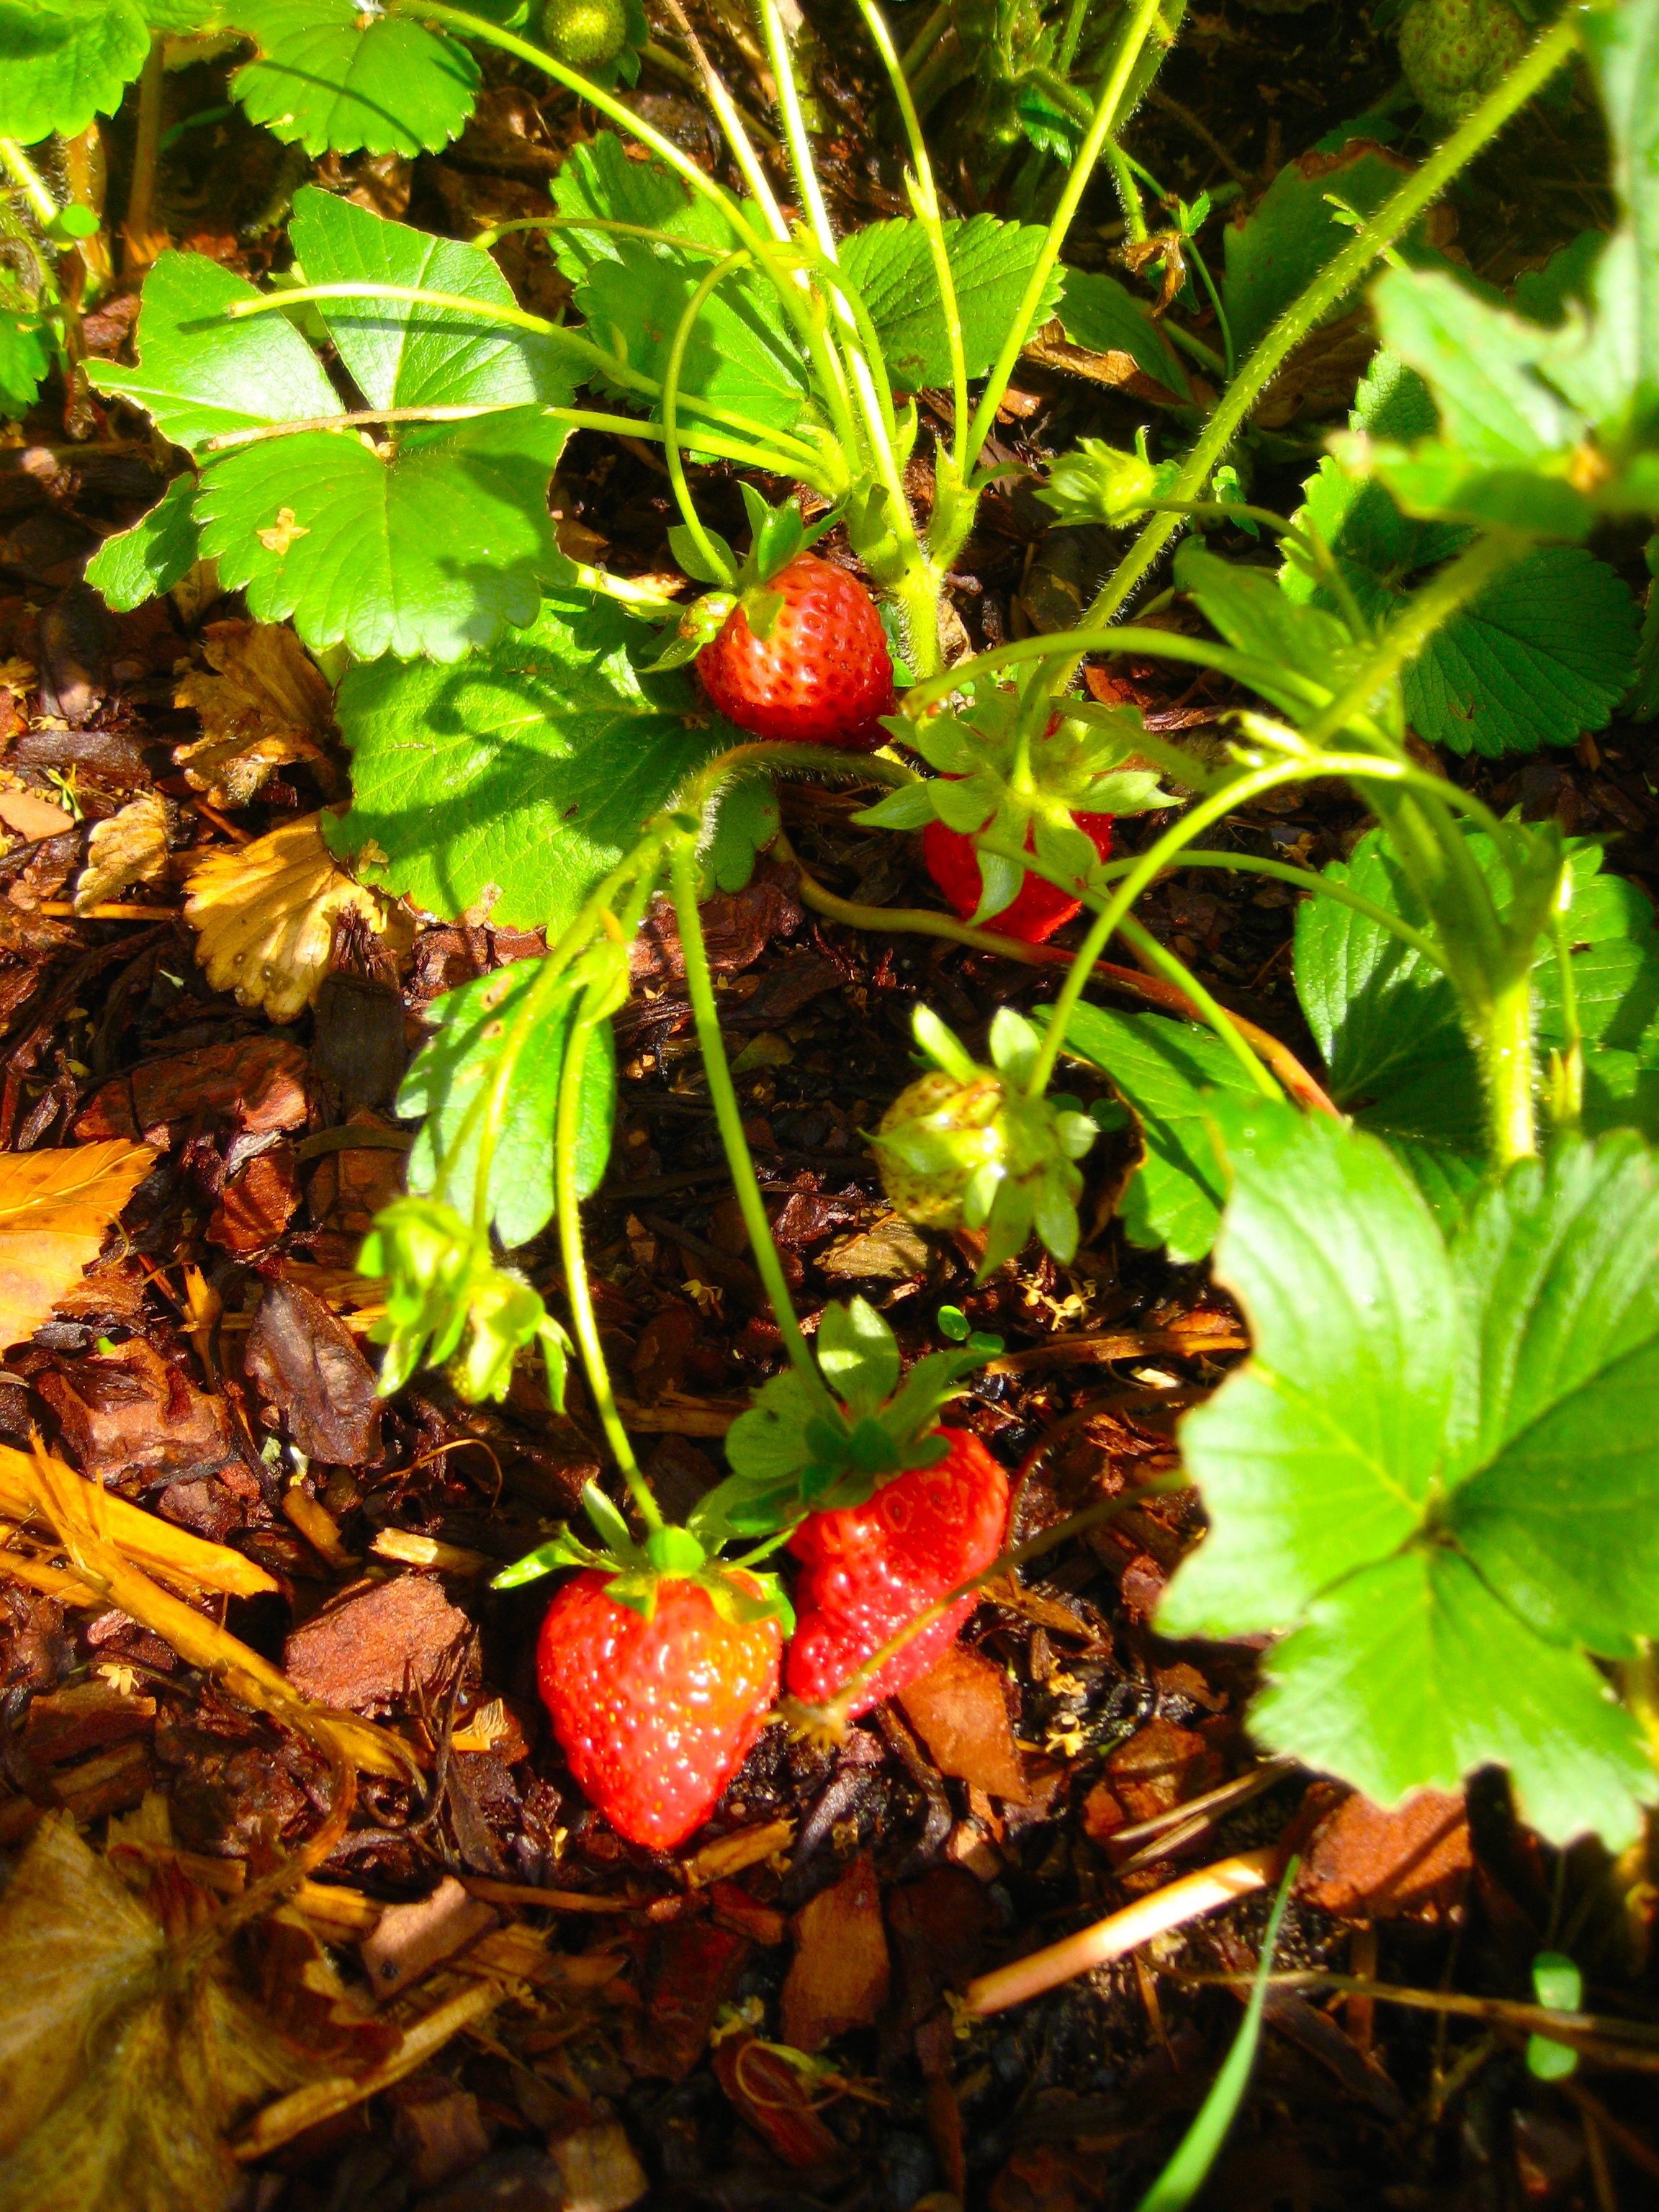
I’ve been gardening in Germantown for three years now and I’ve had a tough time bringing in a substantial harvest. Last year all my squash and zucchini plants died when I mulched with pine straw (too much acid) and my tomatoes stopped producing during the drought because I had a poor irrigation system. I’ve had to deal with squash worms and aphids too. I really believe that companion planting and using rabbit and chicken manure along with worm castings is really making a difference for me this year. But the biggest change that I’ve made is planting in raised beds. I LOVE raised beds! Creating my own nutritious soil mix without having to till and work our clay soil has been a huge plus. The beds keep the rabbits away and make it easy to attach trellises, netting and connect hoop houses for winter crops. Weeding is also much easier to do with raised beds. The floods and strong winds this spring would normally have hurt my garden but with raised beds every plant fared well.
Over the past three weeks I’ve added five new chicks and four bunny rabbits to my homestead experiment. I also planted a small orchard in the back yard and built a chicken fence. I planted peach and apple trees in my orchard and built a small grape trellis. All my raised beds are finally planted and I’ve been harvesting fresh, organic spinach, kale and romaine lettuce for two weeks now. We are finally picking ripe strawberries too. The girls like to help pick leafy greens for salads and pizzas. It’s so much fun to eat this way! I love the cut and come again romaine lettuce and spinach plants. YUM!
Here’s a list of the plants that I’m growing this year:
Vegetables: spinach, lettuce (romaine and loose leaf), kale, broccoli, onions, garlic, potatoes, green beans, squash, zucchini, cucumber, eggplant, green, purple, red and yellow bell peppers, banana peppers, jalapeno peppers, carrots, corn, celery, tomatoes, okra, lima beans, black beans, alfalfa.
Fruit: grapes, peaches, tangerines, apples, lemons, strawberries, blueberries, oranges (I’m hoping to plant cantaloupe, watermelon and pumpkins soon).
Companion Flowers: nasturtiums, marigolds, pansies.
Herbs: basil, thyme, oregano, parsley, cilantro, lemon balm, chocolate mint, lavender, dill, mint, sorrel, stevia, apple mint, rosemary.
Here’s my latest photo gallery:


Thoughtful Chicken Raising
Thoughtful Chicken Raising, by Sharon, April 22nd, 2011, Posted on The Chatelaine’s Keys
Read the original article here
Poultry is the new black, right? Well, maybe not, but when you think about greater self-sufficiency and backyard farming and such, the first thing a lot of people imagine is getting some chickens.
Now on one hand, I think that’s a good idea. There are many compelling reasons to keep chickens. First of all, industrial chicken and egg production is one of the filthiest, most inhumane, most grotesque industries of all time. You probably already know that the chickens are essentially tortured during their short lives, living in filth, crammed in tiny cages, etc… I won’t bother reiterating what we all already know, but if you buy eggs or chicken at the supermarket, you are, with your dollars, saying, “I’m ok with torturing animals and polluting the planet just so I can have meat and eggs.” Organics, industrial kosher and “free range” (which really doesn’t mean what you think it does) are marginally better, but much more like industrial production than not.
So what is a person who likes to eat eggs and the occasional bowl of chicken soup to do? If you raise four laying hens in your backyard, you will average 2 eggs per day – enough for a household of four to have an egg each every other day. 8 hens, which would fit comfortably in your average suburban backyard, will keep you in all the eggs you want much of the year. Eggs are a superb source of protein, and quite delicious. They enhance most baked goods.
In addition, you will get chicken manure (in industrial concentrated production, chicken manure is a problem – in your yard, it is a blessing on your garden), and when the hens get older, and stop laying so well, if you are brave about this sort of thing, you can make chicken and dumplings out of them. Or you can keep the hen as a pet. They are friendly things, make pleasant noises (you don’t need a rooster to get eggs, and in fact most people in close proximity to neighbors shouldn’t keep a rooster) , and good natured. Children can pet them, and there isn’t a child or adult in the world who doesn’t get excited when they find an egg. All my children have grown up with chickens, but the excitement has never waned.
Chickens will eat your food scraps, including meats and things you can’t put on the compost pile, and return you beautiful eggs. They will eat bugs, including japanese beetles, slugs and ticks that pester us. All they require is an area of grass to scratch on, the most basic housing (4 hens can live comfortably in a doghouse, but for gathering eggs and straw removal you might want something else).
Now some areas do not permit chickens, but surprisingly many do, and if they don’t, this is something to take up with your town board or whoever is in charge. Get your neighbors to help – promise them as many delicious, orange yolked, lovely eggs as they want if they will help you. Show them how cute the baby chicks are, and how sweet natured a Buff Orpington hen is when a five year old picks her up and carries her around. 6 hens make far less noise, mess and trouble than one Golden Retriever for neighbors, and are infinitely more useful. Their manure is less dangerous than a dog’s poop, they carry fewer human-dangerous diseases. Any society that permits household dogs can rationally accept household chickens, so do not let nonsense about salmonella and bird flu deter you or your city. That does not mean it will always be easy, but it is well worth a try.
But – and I want everyone to pause at that but – it is worth thinking about how we’re going to feed these chickens. Because a lot of people get chickens and think their work on the path to sustainability is done. But if your chickens are eating a lot of grains, it would probably be more productive for you to simply eat the grains. And if those grains come from long distances, and are not organic, you’ve done something, but not enough. If you are feeding your chickens GM corn and Roundup-ready soybeans, then you will both get out of them what you put in, and are again, with your dollars, tacitly saying “these practices are ok.”
So how do we feed chickens so that they produce eggs and meat for us, but don’t require us to violate basic principles about raising things sustainably? Well, chickens are always going to need some grain, but they can get quite a lot of their food foraging in your yard for bugs, eating grass, and from your household scraps. Most American households could easily feed half a dozen chickens more than 80% of their diets from their own scraps, scraps obtained from their neighborhood (talk to neighbors, your local coffee shop, the market, etc…) lawn and bugs.
Lots of people raising poultry and feeding them mostly grains raises a major problem – among other difficulties, besides the fact that your eggs may or may not be any lower in environmental impact than the other eggs, when grain is fed to livestock in the industrial world, it raises grain prices in the Global south, where much of the grain is fed directly to humans. Competitions between the livestock and pets of industrial people and the world’s poor are always a losing battle for the world’s poor – they can’t compete. So finding ways to keep your chickens on homegrown feed or food scraps, as is done in much of the world, is essential.
Now back to the lawn. Presumably, you didn’t want the bugs, mostly anyway. The lawn might bother you a bit – after all, if you live in a suburban neighborhood, you may have one of those lawns that looks like it was painted on, and the thought of chickens pooping on your lawn may be traumatic. But if you build a chicken tractor (that is, a small pen that can be moved easily), and put the chickens in a small spot on your lawn each day, you’ll fertilize that spot, won’t have excessive quantities of manure, and get your grass trimmed too. Or, you can build them a yard where they can poop their heart’s content, and you can bring them your weeds, lawn clippings, as well as the scraps from your garden, and keep them blissfully happy. Generally speaking you’ll want breeds of hen that are good foragers – we’ve had great luck with Buff Orpingtons, Dark Cornish and Aracaunas.
For the other 20% of their diet you’ll need grains and a source of fairly intense protein, and maybe a source of calcium. If they have open ground, you won’t need to worry about grit too much. Now we shouldn’t be trying to duplicate commercial diets – the idea is not to maximize meat or egg production, but to get the most out of the animals without either shortening their lives or making your own life stressful.
Locally produced staple grains can feed chickens – you can grow them in your garden if you have enough room. Dry corn, for example, is not hard to grow, and it wouldn’t take much space to grow a year’s supply for a small number of hens. Wheat, oats or millet need not be threshed or anything. Just grow them (they grow like grass, because they are grasses), cut them down, and toss a bundle in with the hens now and then – the straw will make bedding for them and they’ll scratch out all the grain. Even potatoes can be used, and potatoes are the easiest staple starch to grow in cold, rocky areas like the Northeast. Potatoes must be cooked, but you could easily boil a big pot of potatoes every few days and toss the rest to them gradually. Or you can buy grains from a local small producer.
As for protein, if you have enough land, you could use extra milk from goats or cows (chickens will also happily drink milk you let sour in the fridge.) If you can find enough scraps to support them and the chickens, you could raise either earth or meal worms in your house, and use them as a supplementary source of protein. Or, of course, there’s soybeans, if you can buy them locally. Your own meat scraps will provide some. If you have spare eggs, you can even cook them and feed them back to the hens (you don’t want to teach them to eat raw eggs, trust me). In any case, any shells you don’t need should be cooked, crushed and fed back to the chickens for calcium supplementation. With that, you’ll need only a little oyster shell or other source of calcium.
At most, you should be bringing in a small percentage of the hens’ total diet, if you are working towards sustainability – because those sacks of feed will probably not be available forever. Might as well make good eggs now!
Sharon
The Best Medicinal Herbs To Grow
eHow – The Best Medicinal Herbs To Grow
By J. Lang Wood, eHow Contributor
The environmental movement has spawned an interest in growing plants that have been used traditionally for their medicinal properties. Many of these plants are easy to grow in most regions, while others do well when grown indoors. The plants can be prepared as infusions, tinctures, syrups, or as oils for medicinal use. Those interested in growing and using plants for medicinal purposes should carefully research how these substances should be used and in what amounts. Like all medicines, improper use can be dangerous.
- Aloe Vera – Aloe Vera is a plant that grows commonly in the southwestern United States. The leaves produce a mucous-like substance that possesses cooling and healing properties. It can be used against sunburn, kitchen burns, and other skin irritations. In a juice form, aloe vera is used against ulcerative colitis, constipation, and other digestive disease
- Sage – Sage is a cooking herb as well as a medicinal plant. It was often used to help indigestion, flatulence, depression, and menopausal symptoms.
- Peppermint – Besides its delicious smell, peppermint has been in use since ancient times for its medicinal properties. It is used to help upset stomach, spastic colon, and irritable bowel syndrome, as well as to reduce fevers.
- Tea Tree – Tea tree oil is used in many over-the-counter medicines and beauty products. It can be used to help acne, athlete’s foot, burns, cold sores, insect bites, and vaginal infections. Tea Tree can also be used against chronic fatigue syndrome.
- Ginseng – Ginseng is a plant highly regarded for its medicinal properties. It is used to relax the nervous system, stimulate hormone production, treat insomnia, lower blood sugar and cholesterol, and improve general stamina.
- Feverfew – Feverfew is a very old medicinal plant that has been used for hundreds of years to treat colds, fevers, and arthritis, as well as for bruises, swollen feet, and to help with migraine headaches.
- Fenugreek – The seeds of fenugreek are nutritious and are taken to treat inflammation of the stomach and intestines. It can also be used for the treatment of late onset diabetes, to lower cholesterol levels, to prevent cancer of the liver, and for labor pains.
- Evening Primrose – The roots can be eaten and the shoots can be added into a salad. A tea is often made from the roots to treat obesity and bowel pain. Leaves and bark, which are made into evening primrose oil, treat rheumatoid arthritis, eczema, acne, and premenstrual disorders.
- Chamomile – Besides being known as a soothing tea, chamomile can be used for a number of ailments, including a cold, diarrhea, earache, toothache, digestive disorders, eczema, and common wounds.
- Echinacea – This lovely flowering plant is known as one of the most important medicinal herbs in any medicinal garden. It can be used to treat wounds, burns, insect bites, and even snakebites. It is also used to strengthen the immune system in fighting allergies.
Precautions When Using Medicinal Plants – Pregnant or nursing women should not use medicinal plants unless under the supervision of their doctors. Always let your physician know what medicinal plants you have been using. If there are any changes in heart rhythm, vision, mental processes, dizziness, itching, rashes, or abnormal bleeding, discontinue use of medicinal plants and consult with your physician.
—————————————————————————————————————————————————————————————————————————————
Related Articles:
Square Foot Gardening
Square foot gardening
From Wikipedia, the free encyclopedia
Square Foot Gardening is the practice of planning small but intensively planted gardens. The phrase “square foot gardening” was popularized by Mel Bartholomew in a 1981 Rodale Press book and subsequent PBS television series. A full-length companion DVD, Square Foot Gardening (2010), was recently released in collaboration with Patti Moreno the Garden Girl. The practice combines concepts from other organic gardening methods, including a strong focus on compost, closely planted raised beds and biointensive attention to a small, clearly defined area. Proponents claim that the method is particularly well-suited for areas with poor soil, beginning gardeners or as adaptive recreation for those with disabilities.
The original square-foot-gardening method used an open-bottomed box to contain a finite amount of soil, which was divided with a grid into sections. To encourage variety of different crops over time, each square would be planted with a different kind of plant, the number of plants per square depending on an individual plant’s size. A single tomato plant might take a full square, as might herbs such as oregano, basil or mint, while most strawberry plants could be planted four per square, with up to sixteen radishes per square. Tall or climbing plants such as maize or pole beans might be planted in a northern row (south in the southern hemisphere) so as not to shade other plants, and supported with lattice or netting.
The logic behind using smaller beds is that they are easily adapted, and the gardener can easily reach the entire area, without stepping on and compacting the soil. In the second edition, Bartholomew suggests using a “weed barrier” beneath the box, and filling it completely with “Mel’s mix,” a combination by volume of one third of decayed Sphagnum “peat moss”, one-third expanded vermiculite and one-third blended compost. For accessibility, raised boxes may have bottoms to sit like tables at a convenient height, with approximately 6″ (15cm) of manufactured soil per square foot.
In this method, the garden space is divided into beds that are easily accessed from every side. A 4′ x 4′, 16 sq ft (1.5 m2) or 120 cm x 120 cm, 1.4 m2 garden is recommended for the first garden, and a path wide enough to comfortably work from should be made on each side of the bed, if possible, or if the bed must be accessed by reaching across it, a narrower one should be used so that no discomfort results from tending the garden. Each of the beds is divided into approximately one square foot units and marked out with sticks, twine, or sturdy slats to ensure that the square foot units remain visible as the garden matures.
Different seeds are planted in each square, to ensure a rational amount of each type of crop is grown, and to conserve seeds instead of overplanting, crowding and thinning plants. Common spacing is one plant per square for larger plants (broccoli, basil, etc.), four plants per square for medium large plants like lettuce, nine plants per square for medium-small plants like spinach, and sixteen per square for small plants such as onions and carrots. Plants that normally take up yards of space as runners, such as squash or cucumbers, are grown vertically on sturdy frames that are hung with netting or string to support the developing crops. Ones that grow deep underground, such as potatoes or carrots, are grown in a square foot section that has foot tall sides and a planting surface above the ground, so that a foot or more of framed soil depth is provided above the garden surface rather than below it.
The beds are weeded and watered from the pathways, so the garden soil is never stepped on or compacted. Because a new soil mixture is used to create the garden, and a few handfuls of compost are added with each harvest to maintain soil fertility over time, the state of the site’s underlying soil is irrelevant. This gardening method has been employed successfully in every region, including in deserts, on high arid mountain plateaus, in cramped urban locations, and in areas with polluted or high salinity soils. It is equally useful for growing flowers, vegetables, herbs and some fruits in containers, raised beds, on tabletops or at ground level, in only 4 to 6 inches (150 mm) of soil. A few seeds per square foot, the ability to make compost, to water by hand, and to set up the initial garden in a sunny position or where a container, table or platform garden may be moved on wheels to receive light is all that is needed to set up a square foot garden.
Benefits of Square Foot Gardening
Much less work. Conventional gardening requires heavy tools to loosen the soil, whereas in this method, the soil is never compacted and it remains loose and loamy. Weeding takes only seconds to minutes, due to the light soil, raised beds, and easily accessed plants. Harvests per foot of garden are increased due to the rich soil mixture, well-spaced plants, and lack of weeds produced when following Mel Bartholomew’s method.
Water Savings. The soil mixture that is advised has water-holding capacities, so that the garden needs water less frequently, and in much smaller quantities than when using other gardening methods. Water is also spared by hand-watering directly at the plant roots, so that there is very little waste[1] and tender young plants and seedlings are preserved
Very little weeding. One benefit of this close planting is that the vegetables form a living mulch, and shade out many weed seeds before they have a chance to germinate.
Pesticide / Herbicide Free. Natural insect repellent methods like companion planting (i.e. planting marigolds or other naturally pest-repelling plants) become very efficient in a close space and thus, pesticides are not necessary. The large variety of crops in a small space also prevents plant diseases from spreading easily[1]
Accessibility. A plywood bottom can be attached to the bottom of a box, which can then be placed on a tabletop or raised platform for those who wish to garden without bending or squatting, or to make gardening easy for wheelchair, cane or walker users.
Covers and Cages. Because all beds are small (4’x4′ or smaller), making covers or cages to protect plants from pests, cold, or sun is more practical than with larger gardens.
Square foot gardening is especially compatible with:
Raised bed gardening
Companion planting
French intensive gardening
Organic gardening
Read, “Square Foot Gardening”.
Andrew Vowles; Vern McGrath, Susan Todd (June/July 2002). “The Plot Thickens: Square-foot gardening offers bigger yields in less space”. Techniques (Canadian Gardening (CG Online)): p. 96. Retrieved 2007-08-06. Note: Publication Information found in 2002 Article Index and is not available on-line with the article
[edit]Further reading
Mel Bartholomew Interview – An Interview With the Creator of Square Foot Gardening
Official Site of Square Foot Gardening website of creator Mel Bartholomew, includes info on how to get started, tips and FAQs
Square Foot Gardening – Grow more in less space
Square Foot Gardening
Many thanks to Mel Bartholomew and his book: “All New Square Foot Gardening” (available at many libraries also). www.squarefootgardening.com
Read the original article here
Covered on this page:
Advantages of Square Foot Gardening
How To Make a Square Foot Garden Raised Bed
Planting your Square Foot Garden
Adaptations for Unique Situations
Advantages of Square Foot Gardening (sfg): (back to top)
- Square Foot Gardening (sfg) perfect for Beginners.Most beginners tend to enthusiastically try to plant a much bigger vegetable garden than they can possibly manage. This results in a big mess of an untended, weedy vegetable garden, with little yield. It also provides a generally unpleasant gardening experience.
The square foot garden, however, is far more manageable and actually requires less work.
- Square Foot Gardening (sfg) perfect family project for Children. Give each child their own square foot garden (sfg) to plan, plant, and manage. Besides learning about the science and art of vegetable gardening, a square foot garden project also teaches planning/reasoning skills, basic mathematics, patience, and discipline.
- Very Few Weeds with Square Foot Gardening Because you’re using a perfect blend of soil to nourish your plants, there should be few weed seeds that are imbedded in your square foot garden bed. You may pick up a few weeds that place themselves there through nature (wind, etc.), but they’re easy to pick out.
One of my biggest worries when weeding the garden is which is a weed, and which is the sprout that I want to keep. With square foot gardening, you know precisely where you planted your seeds. Anything growing outside of that precise location, is a weed and needs to be removed. It takes the stress out of weeding!
It Doesn’t Matter What Your Soil Is Like, With Square Foot Gardening
In your square foot garden, you build your vegetable garden bed from the ground up. It doesn’t matter what type of soil is underneath, as you create the perfect soil for your vegetable garden in the raised bed. It’s far more efficient, as you’re more concentrating your efforts to the actual gardening space.
In a traditional garden, you spend hours (years) and significant money to treat and condition the soil into something that’s usable. And, most of that dirt (that you so carefully created) doesn’t get used (except, perhaps, by weeds). Square foot gardening concentrates your soil-building efforts to only the garden space that you’re actually going to use.
- No More Rotor-Tilling, with Square Foot Gardening (Need I say more?)
- No Fertilizer Needed, with Square Foot Gardening If you use the recommended blend of soil (6” of soil is all you need for your square foot garden bed), you will not need to fertilizer your vegetable (or flower) garden. The soil will provide all the nutrients that are needed.
- Less Water Needed, with Square Foot Gardening Because you will be growing your vegetables and flowers in a concentrated space, you will spend less water (and less time) watering your garden
- Less Seed Needed for your Square Foot Garden You will be maximizing your yield in a small space, so you will find that you need much fewer seeds for your garden than you did with the traditional in-ground “row” style garden.
How to Make A Square Foot Garden Raised Bed: (back to top)
Location: Pick a spot that’s not too far from your house. Your square foot garden bed will be pretty & you want to be able to enjoy it. Plus, the closer it is to the house, the more likely you will be to keep it tended. Pick a reasonably flat location, with plenty of sunshine. It’s best to place the garden bed away from trees and shrubs, as their roots will search out your garden bed area.
Materials:
You will need the following materials, for one complete Square Foot Garden Bed.
- four (untreated) boards, 2”x 6”x 4’ (most lumber yards will cut the boards to size for no additional cost)
- six lath boards (4 feet long)
- weed (ground) cloth
- coarse thread wood/deck screws
- soil mixture (see description)
- drill
You may be tempted to make a larger garden bed than the 4×4 square. When considering this, please keep in mind that the 4’x4’ bed was designed specifically so that you can easily reach into the bed without ever having to walk on (compress) the soil within the bed.
Or for beautifully hand-crafted square foot gardening kits, look here: www.squarefootgardening.com
Assembly:
Fasten the corners using 3 wood (deck) screws at each corner. Rotate or alternate corners to end up with a square inside.
Note: Excellent photographs & diagrams showing the easy assembly instructions are included in Bartholomew’s latest book:
Roll out the weed cloth so that I completely covers the area that you wish for your square foot garden. (I prefer to overlap the weed cloth, so that the weeds don’t push their way up through a gap in the fabric.)
Place the frame over the weed cloth.
Note: It’s best to allow at least 3 feet or more between the square foot garden bed and any other obstacles (including other square foot garden beds). This will give you ample room to mow between, and also enough room to comfortably work in the garden bed without feeling crowded.
Soil
Use this soil mixture for the best results:
- 1/3 coarse vermiculite (16 cubic feet)
- 1/3 peat moss (16 cubic feet)
- 1/3 compost * (total of 16 cubic feet)
* It’s best to use compost you’ve made, but if that’s not an option, be sure to use a mixture of at least 5 different types of (store-bought) compost. This will give you the best mixture of nutrients.
You can use a tarp, laid out on the ground as your mixing bowl, to mix the soils. Then fill the garden frame to the top. (6” of soil is all you need for all gardening, except for root crops like potatoes and carrots. You’ll want a deeper garden bed for those.)
Once the bed has been filled with the soil mixture, water the bed. Once it settles, add more soil mixture, filling it to the top. Repeat this process a total of 3 times.
Apply the grid:
The grid is a very important part of this gardening procedure. Please be sure to include it. You may find other materials that work well for the grid also.
For the grid: measure and mark at 1 foot, 2 feet, 3 feet on each board of the frame. Attach a lath board so that it rests at the 1 foot mark on one side and also at the same point on the opposite side of the frame. Attach with screws. Repeat, so that the lath boards are 1 foot apart. Then, repeat the entire process on the adjoining side. The end result should be a grid that provides you with 16 1’x1’ squares.
Planting your Square Foot Garden Raised Bed: (back to top)
In advance, you know that you will have a total of 16 x 1 foot by 1 foot squares to plant, so be sure to plan ahead.
- For starters, you’ll want to place tall plants on the north side of your square foot garden bed (so they don’t shade the other plants in your garden).
- Consider companion planting (click here for info on companion planting). This is a natural process of placing plants that thrive together, near each other. Also, of considering a strategy to avoid placing plants near each other that tend to stunt each other’s growth.
- Timing. Some plants grow well as early or late season crops. Some need the heat of summer. Some grow in a short time frame, some take the entire growing season. If you plan your garden right, you can get several crops out of each space before the growing season is over!
For very large plants (like cabbage, peppers and broccoli), you’ll want to place one plant per square (place it in the center of the square).
Large plants (like leaf lettuce, swiss chard, marigolds) can be placed 6 “ apart, at 4 plants per 1’ square. (You would simply draw a cross in the dirt in your 1 foot square, dividing it into 4 sections. Then plant each item in the center of the smaller squares)
Medium plants (like spinach and beets) can go 4” apart, so 9 plants per square.
Small plants (like carrots, radishes, onions) can go 3” apart, so 12 plants per square.
So, except for the largest plants, you will have a grid within each square of the larger grid.
Note: If this sounds confusing, please check out the description, diagram, and instructions included in the book… it will all make perfect sense!
Planting Seeds in your Square Foot Garden:
Poke a hole in the dirt with your finger, and sprinkle a few seeds in the hole. Cover with dirt, but leave a slight saucer like indentation over the area where the seeds are. (This will allow more water to get to your seeds, and to the plant’s roots once it’s grown – rather than the water just running off!)
Once the seeds immerge, take a scissors and cut the weaker looking sprouts, leaving only 1 sprout per planted area. (Pulling the sprouts out can damage the survivor’s roots, causing a weaker plant more susceptible to plant diseases and pests.)
Planting Seedlings in your Square Foot Garden:
Some plants will produce sooner and better if you start them indoors and transplant the seedlings into your outdoor square foot garden. (Tomatoes, peppers, etc.) Be sure to harden-off the plants before moving them to the outdoor garden.
Hardening-off simply means getting them used to the out of doors. Placing them immediately outside will cause the plants too much shock, and the sunlight will likely burn them. Start by placing them in the shade. Then day by day, move them a little more into the sunlight.
Watering:
It’s best to water from beneath the plant, rather than from the top down. (Top down watering tends to invite plant diseases and funguses.)
Bartholomew prefers to keep a couple of large buckets of water by his square foot garden, that have been warmed naturally by the sun (the warm water helps keep the soil warmer and doesn’t shock the roots). He then ladles a cup of water into the saucer-like depression around each plant. It gets readily absorbed and efficiently goes right to the plant’s roots.
Don’t over water (this also invites plant diseases). Your climate will determine how often you need to water, so you’ll want to keep an eye on the plants. You will need to water them a little more frequently than you would the plants in a regular garden. But they take less water at a time, and use it more effectively. You can also consider drip-irrigation hoses.
Adaptations for Unique Situations (back to top)
The book “All New Square foot Gardening” has wonderful illustrations, descriptions and photographs, for suggestions addressing the following:
- table top gardening for gardeners that are physically challenged
- railing and planter gardens
- structure design to add to your square foot garden, so that it can support melons, pumpkins, squash, more easily. (These plants can actually climb successfully – no need for them to sprawl all over your garden!)
- structure design to easily turn your square foot garden into a mini-greenhouse
- suggestions for keeping critters out of your square foot garden
Companion Planting for Your Garden
Companion Plating
Companion planting is the practice of inter-planting different plant species to reduce pest problems or improve plant growth.
Companion Vegetable Garden
It’s said that vegetables are like people, they thrive on companionship. It is believed that vegetables will yield up to twice as much when they are surrounded with companion plants. So in this article we will discuss the top 12 vegetables and their best friends.
If you’re getting ready to plant your vegetable garden you may want to try placing the various vegetable crops so you can take advantage of their natural friends. If you have already planted your vegetable garden you may want to make some changes in subsequent plantings later this summer.
The following are a list of the top 12 vegetables and their ideal planting companions.
Beans–they like celery and cucumbers but dislike onions and fennel.
Beets–Bush beans, lettuce, onions, kohlrabi, and most members of the cabbage family are companion plants. Keep the pole beans and mustard away from them.
Cabbage–Celery, dill, onions and potatoes are good companion plants They dislike strawberries, tomatoes, and pole beans.
Carrots–Leaf lettuce, radish, onions and tomatoes are their friends, Plant dill at the opposite end of the garden.
Corn–Pumpkins, peas, beans, cucumbers and potatoes are nice companion plants, Keep the tomatoes away from them.
Cucumbers–They like corn, peas, radishes, beans and sunflowers. Cucumbers dislike aromatic herbs and potatoes so keep them away.
Lettuce–It grows especially well with onions. Strawberries carrots, radishes and cucumbers also are friends and good companion plants.
Onions–Plant them near lettuce, beets, strawberries and tomatoes but keep them away from peas and beans.
Peas–Carrots, cucumbers, corn, turnips and radishes plus beans, potatoes and aromatic herbs are their friends. Keep the peas away from onions, garlic, leek, and shallots.
Radishes–This is one vegetable that has a lot of friends, they are excellent companion plants with beets, carrots, spinach and parsnips. Radishes grow well with cucumbers and beans. It’s said that summer planting near leaf lettuce makes the radishes more tender. Avoid planting radishes near cabbage, cauliflower, brussels sprouts, broccoli, kohlrabi or turnips.
Squash–Icicle radishes, cucumbers and corn are among their friends.
Tomatoes–Carrots, onions and parsley are good companion plants. Keep the cabbage and cauliflower away from them.
Sometimes plant friendships are one-sided. Carrots are said to help beans, but beans don’t reciprocate. Though beans will help nearby cucumbers.
Other plants have bad companions and you’ll be doing them a favor to keep them apart. Beans and onions are natural enemies so keep them at opposite sides of the garden.
If you have a patio you might try mint to repel ants, and basil to keep the flies and mosquitoes away. Both herbs have pretty flowers and are fragrant too. Besides, they’re nice to harvest and use in the kitchen. In her book, “Carrots Love Tomatoes” Louise Riotte, says getting to know good and bad companions can double the bounty of your garden. The only required work is to plan your garden planting properly.
“Carrots Love Tomatoes”, Garden Way is an informative, well-illustrated guide to the subject of companion planting. The book recently reprinted was originally published under the title “Secrets of Companion Planting for Successful Gardening”.
If you would like more information on the various plants to use for companion planting and natural insect and disease control, you’ll find “Carrots Love Tomatoes” is available in bookstores that carry the Garden Way books.
——————————————————————————————————————————————————————————–
Plants that Help Broccoli Grow Better
- Celery, potatoes, and onions improve the flavor of broccoli when planted nearby.
- Aromatic herbs, such as rosemary, sage, dill, and mint, help broccoli by repelling insect pests.
- Plants that require little calcium, such as beets, nasturtiums, and marigolds are good companions because they grow happily with broccoli–a notorious calcium-hog.
Plants Helped by Broccoli:
It’s a great idea to inter-plant broccoli with plants that don’t need a ton of room and enjoy some shade in late spring and early summer. Some ideas include loose leaf lettuce, spinach, and radishes.
Plants to Avoid Planting Near Broccoli:
Tomatoes, pole beans, and strawberries are all said to negatively affect the growth and flavor of broccoli.
———————————————————————————————————————————————————————————-
Companion Plants for Spinach
Spinach tastes best when the leaves are young. It is a good idea to plant a row of spinach every two to three weeks, starting in early spring, until early summer. You can resume this schedule of planting again in early fall. Spinach grows well with beans, cabbage, celery, onions and peas. It is not happy when growing near potatoes. During the summer, you can grow cucumbers, summer squash, tomatoes, peppers, eggplants, and other warm-season crops.
———————————————————————————————————————————————————————————–
Companion Plants for Strawberries – By Michelle Brunet, eHow Contributor
Plant strawberries with vegetables to make use of space and enrich the soil.
If you only have a small area to work with, companion planting will allow you to squeeze more types of plants into your vegetable and fruit garden. Plant your strawberry plants at least 15 inches apart and the rows 3 to 4 feet apart, but make the most of the empty space between plants and rows with companion vegetables and herbs. Vegetables planted with strawberries will mask the foliage and the fruit’s aroma, protecting the strawberries from potential pests. Companion plants also will add essential nutrients to the soil.
Borage
Borage is an herb that has a slight cucumber taste. It can be added as a green to salads or as flavor to soups and other dishes. It is also the “O blood type” of the companion planting world, compatible with almost any crop, including strawberries. Borage will improve soil richness by adding trace minerals, such as calcium and potassium, to your garden medium. It also attracts beneficial insects like pollinators and predatory wasps that will keep pests away. Borage will provide visual appeal to your garden as it flowers with blue, star-shaped blossoms.
Sage
Sage is another herb that may be planted with strawberries. It will attract bees, which are important pollinators, to your garden. It will also provide a pleasing aroma and visual appeal with its oblong-shaped leaves and blue, pink or white flowers. You can harvest sage leaves and use them to flavor poultry, meat and vegetable dishes.
Vertical Plants
You can plant vertical plants that climb up trellises and poles, such as certain varieties of peas and beans, alongside strawberry plants. Strawberries grow along horizontal runners, thus pea and bean climbers can take advantage of open vertical space in your garden. Peas and beans also add nitrogen to the soil.
Onions
Onions are also compatible with strawberry plants. They keep away the insect pests that tend to destroy strawberries, including aphids, weevils, spiders and nematodes. If you choose to plant onions with your strawberries, unfortunately beans and peas will not prosper.You can harvest both the greens and roots of onion plants.
Greens
Lettuce and spinach work well with strawberries in a companion garden. Oregon Live.com recommends establishing strawberry plants first and then filling the empty spaces with lettuce, spinach and onions. You can create a zigzag pattern with your strawberry plants amongst greens; create rows of interspersed greens and onions separated by rows of strawberries, or create a row of greens, a row of strawberries in the middle, followed by a row of onions.
Marigolds
Marigolds provide a fiery presence to the produce garden.
For a flower companion for strawberries, consider planting marigolds. They deter nematodes but also provide a visual splendor of orange, yellow or red blossoms. Marigolds also have a distinctive aroma that is pleasing to any gardener.
—————————————————————————————————————————————————————————
Perfect companions for tomatoes
Carrots:
Carrots work well with tomatoes because they share space well. The carrots can be planted when the tomatoes are still quite small, and can be happily growing and ready to harvest by the time the tomato plants start to take over the space.
Chives, Onions, and Garlic:
Members of the onion family are beneficial to plant with many types of crops due to the pungent odor they emit. This helps deter many insect pests.
Borage:
Borage helps deter tomato hornworm.
Asparagus:
Asparagus and tomatoes are good neighbors. Asparagus puts on growth very early in the season, and the tomato plants fill in after asparagus has been harvested. Also, tomatoes help repel asparagus beetle.
Marigold:
Marigolds help deter harmful nematodes from attacking tomatoes. The pungent odor can also help confuse other insect pests. To deter nematodes, the best practice is to grow the marigolds, then chop and till them into the soil at the end of the season.
Nasturtium:
Nasturtiums help deter whitefly and aphids.
Basil:
Growing tomatoes and basil together increases the vigor and flavor of both crops.
Spinach, Lettuce, Arugula:
These are also “good neighbor” crops for tomatoes. They stay fairly small, and will grow better in the heat of summer when shaded by the growing tomato plants.
What Not to Plant with Tomatoes:
The following crops should not be planted with tomatoes:
• Brassicas: Tomatoes and all members of the brassicas family repel each other and will exhibit poor growth when planted together.
• Corn: Tomato fruit worm and corn ear worm are nearly identical, and planting these two crops together increases the possibility that you will attract one (or both) of these pests.
• Fennel: Fennel inhibits the growth of tomatoes.
• Kohlrabi: Kohlrabi inhibits the growth of tomatoes.
Potatoes: Planting tomatoes and potatoes together makes potatoes more susceptible to potato blight.
——————————————————————————————————————————————————————
Companion Plants for Blueberries
Although widely planted as a food crop, blueberries (Vaccinium corymbosum) also have aesthetic value as a landscape plant. Their shiny, deep green leaves and dark berries contribute to the summer landscape and their leaves turn an intense shade of scarlet in autumn. During winter, their delicate, upright branches break the monotony of a drab winter landscape. Use them in mixed shrub borders planted alongside other acid-loving shrubs for an unusual mixture of evergreens, spring-flowering shrubs, and summer berries.
Rhododendrons
Well known to thrive in acidic soil, rhododendrons (Rhododendrons spp.) are one of the first plants to bloom in spring. Their delicate blossoms cover the shrubs before their leaves open. Rhododendrons are best interplanted with blueberries used primarily for ornamental value in the landscape, where their flowers will be protected from the late afternoon sun, which can cause them to wilt prematurely.
Heaths & Heathers
Growing wild in the acidic soil of marshes, heath and the related but often-confused-for-it heather are low-growing evergreens. In Britain, the plant commonly called “heath” (Erica carnea) is actually “heather” (Calluna vulgaris). Heaths and heathers make ideal border plants for a landscape bed that includes blueberries. They bloom in late autumn and winter when the garden is barren. Heaths and heathers thrive in the acidic, well-drained soil needed to grow blueberries.
Mountain Laurel
Growing 7 to 14 feet high, mountain laurel (Kalmia latifolia) is an evergreen shrub often found growing alongside rhododendrons. Planted among blueberries, it will add winter interest to the landscape with its reddish bark and gnarled, twisted branches. Mountain laurel grows best in a cool location with a deep mulch to keep its roots cool. Its white or reddish flowers bloom in spring. Its round, brown fruits, which break apart into five valves as it dries, are popular in crafts and dried flower arrangements.
Deerbrush
A native alpine shrub, deerbrush (Ceanothus velutinus) grows 3 to 9 feet high, depending on growing conditions. Its showy white flowers bloom from May through July. The entire plant exudes a strong balsam-like or cinnamon-like scent. Deerbrush must be grown in full sun in well-drained soil that is neutral to slightly acidic, and will tolerate well the acidic soil levels needed to grow blueberries. The leaves of deerbrush contain saponin and were used by Native Americans to make soaps and cleaners.
How to Build a Chicken Tractor
How to Build a Chicken Tractor
by Patti Moreno
Read the original article
Why is it called a chicken tractor? I’ll tell you why – A chicken tractor is kind of like a tractor in that it’s a movable structure that’s easily moved around in your garden allowing you to choose which areas of the garden need fertilizing and/or cleaning up. A chicken tractor works similarly to an electric tractor is that it goes where work needs to be done.
Chickens are awesome at cultivating soil with their sharp-clawed feet and while they’re at it, they are also feasting on everything green and catching bugs and leaving deposits of their nitrogen-rich manure. The digging and scratching action will incorporate rich manure into the soil, making the soil perfect for plant growing.
The most light weight and efficient chicken tractor is made from a wood frame with chicken wire around the sides and the top to allow for freedom of movement and fresh air to come in. Never put mesh wire on the bottom of the tractor because the chickens need unobstructed access to the soil. I always suggest adding doors for easy access to feeding as well as moving the chickens in and out. You will see that I have added a tarp to the top of the tractor which will provide shade. In the video, I show you how to make my version of a chicken tractor that fits into a raised bed. I house my chickens on the raised bed once all of the vegetables have been harvested for the year. They live on the raised bed for about 1 month then I move them to another raised bed in my garden. The raised bed that the chickens were in is allowed to lay fallow for 3 months then it’s ready for planting.
All you’ll need to build my style chicken tractor is lumber, 19 gauge Hardware cloth, screws, washers, a tarp, a hand saw or chop saw and a screw gun!
Getting Started: The Basics
You can do this! Building your own raised bed is a somewhat ambitious project, but it is very doable and if I can do it, anyone can! Spend the next 20 minutes with me and I will show you step-by-step how to build a chicken tractor from scratch (pardon the pun). You can build your own lightweight tractor so that one person, like you, can easily move it around the garden.
The lumber that I use is 2×3 untreated pine wood. Pre-drilling holes before you begin to assemble the cage helps to prevent the wood from splitting and makes screwing the wood together easier. I recommend that you start to assemble the back of the cage first. You would use the same type of screws that you used building your raised bed. In addition to the 2X3 pieces of wood, you will also need some strapping pieces which are very thin pieces, that you will see, provide the “seams” of structure. Once you have established the overall shape and dimensions for the tractor you could start to assemble the doors and just set them aside. Watch me.
- Measure the inside of the raised bed so that your chicken tractor will fit into it
- Pre-drill your holes so it is easier when you are putting it together and to prevent splitting
- Lay out all of your pieces on the ground so you can see the dimensions of what you are building
- Measure the sides to know where you will put your door. (I recommend a front door and a side door – more on that later)
- Never use pressure treated wood when animals are involved. Animals tend to chew on wood and you don’t want them to ever ingest the chemicals used in treating wood.
You know the saying, “measure twice and cut once.” So make sure your measurements are correct!
Framing and Making the Doors
Next in this video I explain the importance of having two doors in your structure for easier access to feeding.
- Write down your measurements
- Make sure your strapping is flush with the main pieces of the structure…
- Put your side door closer to the back
- Make a roost for your chickens. They will love it!
Voila!
Well my chicken tractor is almost done. Once the framing is complete, all that’s left to do is “skin” it with the 19 gauge wire which is 2’ wide. The wire is also known as hardware cloth. You’ll see me run into a little glitch with my strapping – one of the pieces is slightly warped, but I can improve on that once I nail it in.
When your framing is complete, it’s time to put your wire on the frame
Just be aware that strapping is sold in bundles and it is hard to see if one or two of them are slightly warped, but it’s not the end of the world.
Skinning it
Now you see me wrapping the wire around the entire frame of my chicken tractor. The wire that is buckling at the doorway will be cut later, so the door will also be perfect! Next I prep the roof for the wire with a simple hammer and nails.
- The wire around the door may buckle when you attach the wire, but since you will be cutting it, it will smooth out
- Use washers to easily secure the wire against the frame
- Instead of washers you can use a staple gun, but I like using washers.
Tarping it!
We are in the home stretch! After I attach the wire to the roof I remove the excess wire with my wire-cutters. Then I secure the roof by placing an 8’X6’ tarp on top of it. I secure the tarp by adding another layer of strapping to it, which will “sandwich” in the tarp to make it super secure. The tarp is a little larger than the structure and if you want you can trim it to make it fit perfectly.
- Have a tarp covering that is around 8X6 which will fit perfectly over this tractor
- You’ll need wire cutting scissors for this part
- You’ll also need more strapping
Closing the DOORS on this project!
“4 pieces of wood – make a box and that’s it!”
Which is really all you have to do to make the two doors that I suggest for your chicken tractor; one in the front and one near the back. Once you have put these four pieces of wood together (the box), you will just need to add the wire which is the same process you have been using all along. The last step is adding hinges to the doors which will make them work better as doors. Once you have put them in their perfectly measured space – this baby is done and ready for chickens!
Let’s go outside…
Once outside, the chicken tractor looks great and ready to do what it’s supposed to do. Here are some more tips so you can make your own chicken tractor.
- Don’t forget to buy your hinges!
- Don’t forget to slide a thin piece of wood at the bottom of the door – to give you a “threshold area” so that the door is not brushing against the soil. (see the video)
- Chickens are very efficient at digging up plants and catching bugs but if you let them loose in the garden they will eat everything, weeds and tomatoes.
- Always put fresh water daily in the tractor for your chickens – it’s hot out there!
- The tractor I build in the video can house no more than 8 bantam chickens or 6 regular size chickens comfortably.
- The more grazing your chickens do, they less expensive they are to keep. feed them weeds and kitchen scraps daily.
- Make sure the tractor fits snuggly inside the raised bed, not on top of the edge of the bed.